Beat the Buzzer: How to Score Against 1-3-1 Zone Basketball
|
|
Time to read 9 min
|
|
Time to read 9 min
Cracking the code to score against 1-3-1 zone basketball feels like unlocking a secret level in a game—thrilling and rewarding. Let's face it, this defensive strategy can stump even seasoned teams if they aren't prepared.
Lucky for you, that’s about to change. We're peeling back the layers of the 1-3-1 defense, showing you how to use corner areas and driving lanes effectively. You'll learn not just why ball movement is crucial but also where your players should stand to break down this wall of defense.
Gearing up with these strategies could be your slam dunk moment in youth basketball coaching or playing—so let’s get started on turning those tricky defenses into scoring opportunities.
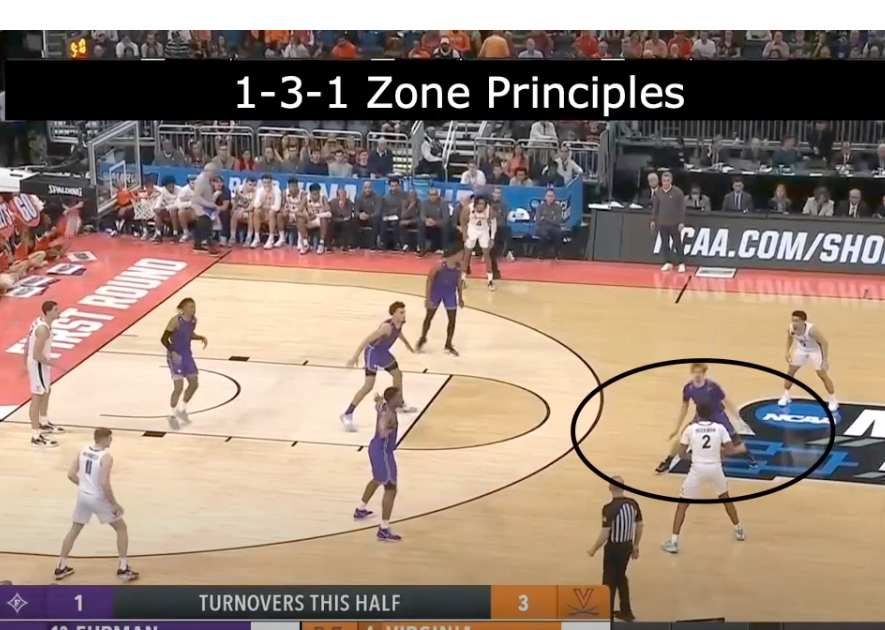
The game of basketball is a chess match, where coaches play with Xs and Os instead of knights and pawns. The 1-3-1 zone defense is one such strategy that turns the court into a battleground for tactical supremacy. It's not just about players moving on hardwood; it's about space, pressure, and anticipation.
This defensive scheme places one player at the top of the key to challenge ball handlers immediately as they cross half-court. Three defenders then span across in line with free throw extended areas while the last man holds down the fort near baseline—running side to side like they've got their own personal marathon track from sideline to sideline. What you're looking at here isn't your everyday cluster of jerseys but rather an intricately woven web designed to trap unsuspecting offenses.
To truly understand this setup, watch how each defender moves—a ballet choreographed by basketball minds intent on limiting penetration and forcing turnovers through well-timed leaps or sprints toward those daring enough to enter their domain.
The beauty—and sometimes curse—of this formation lies in its fluidity; defenders execute defensive pressure based on both ball movement and offensive positioning which can create havoc for teams unprepared for its malleability. The top player works tirelessly trying to turn over opposing point guards, effectively disrupting any initial plans set up during team huddles.
Middle players are tasked with stretching their limits—not only do they cover high post entries diligently but also sprint outwards toward wing threats who think twice before taking potential jump shots when faced with such aggressive closeouts. Meanwhile, bottom defenders rotate quickly between posts: trapping high if needed or bolting low if that’s where trouble brews.
Basketball's 1-3-1 zone defense is a tactical dance, focusing on space and pressure to trap offenses. Watch the top player disrupt plays, while wing defenders aggressively challenge shots and bottom players swiftly rotate to protect the post.
Breaking down a well-executed 1-3-1 zone defense requires more than just wishful thinking; it demands smart, strategic plays. Youth basketball teams can level up their game by mastering four key offensive tactics that turn the tables on this daunting setup.
The corners are your best friends against a 1-3-1 zone. These spots often become no-man's land where defenders hesitate to commit. To exploit these areas, savvy coaches instruct players to get corner touches that stretch the defense thin and create open shots for teammates. When an offensive player catches the ball in the corner area, they force defenders to scramble out of position.
This shift creates potential jump shot opportunities or opens passing lanes for a quick high post entry pass or skip pass across court—two methods known for creating havoc within zones as aggressive defenses rotate and attempt cover high post threats or prevent easy lay ups from materializing under the hoop.
Making room isn't all about shooting skills; sometimes you've got to drive right through them. Driving gaps emerge when ball handlers stay alert and seize fleeting moments as defensive closeouts happen around them. Coaches teach point guards how good spacing lets you catch defenders off-guard with middle dribble penetration—a direct route to scoring layups if executed correctly before double teams form up.
An effective dribble penetrator will also draw multiple defenders, freeing up wing area mates who could be readying themselves for those sweet spot-up jump shots—or better yet—for catching precise entry passes into unguarded post areas thanks to initial driving distractions caused by their teammate's bold move towards the basket.
We're not done there though. Room touches near baseline but outside paint is another clever way of asking serious questions of any zone defense initial setups including our pesky friend—the 1-3-1 formation. When an offensive player gets hold of the ball here, they effectively put one foot inside the defender’s comfort zone without stepping over the line, forcing said defense into uncomfortable decisions: do we collapse onto the invader, thus risking exposing ourselves elsewhere?
The answer should always lead back to 'yes' because now your team set has forced issue and potentially paved the way toward sneaky-high-post-entry-pass completion (bounce passes being MVPs here) or inviting some daring short-corner actions either via shoot or shuffle further along baseline hence trapping high-strung opponents in predicaments beyond simple man-to-man fix-ups.
If attacking peripheries is like playing a strategic game of chess, then it's crucial to think several moves ahead. Anticipating the opponent's actions can give you the upper hand. To win, focus on their weak spots and stay two steps ahead.
Master four offensive moves to crack the 1-3-1 zone: use corners, drive gaps, touch baseline rooms, and attack from high post. These tactics stretch the defense, create openings for shots or passes, and keep defenders guessing.
Dismantling a 1-3-1 zone is like picking a complex lock; every precise movement counts. Proper ball movement forces defenders to adjust and often leaves them scrambling out of position.
A skip pass isn't just an impressive move—it's the bread-and-butter against zones that thrive on hesitation. It's about sending the rock sailing overheads, making it land in your mate's hands before defenders can even blink. Now imagine coupling those skip passes with crisp ball reversals; you're not just moving players, you're orchestrating chaos on the hardwood.
The trick is speed and deception—two elements coaches might mix up by starting their teams in what looks like a 1-3-1 setup but could morph into something else entirely. You've got to read these cues fast because when done right, defenses get duped hard.
If skip passes are your bread and butter, consider pass fakes as the jam that sweetens the deal. These slick movements send defenders flying off course faster than rumors spread at halftime. A well-executed fake can open passing lanes wider than a freeway at dawn.
Faking isn’t lying; it’s strategizing—throwing feints so convincing they’d make magicians proud. This tactic keeps everyone guessing where you’ll strike next: Will it be another smooth reversal or perhaps a sly entry pass?
In basketball defensive strategy circles, forcing an aggressive zone defense to play catch-up as offensive players exchange swift pass fakes, cutting through passing another player effortlessly? That’s pure artistry.
When you're staring down a 1-3-1 zone defense, it's like playing chess on the hardwood. Every move counts and putting your players in the right spots is crucial to break that defensive barrier.
The way defenders scramble around can make it tough to tell if you're up against a true 1-3-1 or its crafty cousin, the 2-3 zone. But don't be fooled—spotting whether there are two guards at the top or one could mean all the difference for your team setup. Once you know what you’re dealing with, getting your offensive players positioned effectively is key.
To beat that aggressive zone setup, start by stationing an expert ball handler at point guard who’s got eyes like a hawk for those passing lanes. The wings need players who aren’t just ready to take potential jump shots but can also dive into those short corners when opportunity knocks.
A player in the high post area acts as your Swiss Army knife—they've got options galore. If they get the good spacing right off the bat, they’ll have room for middle dribble penetration or crisp high post-entry passes without attracting too much of that stifling post-defense attention.
Making sure this player has versatile shooting skills helps keep defenders honest; no double teams here, please. And when defenses do collapse around them? That's their cue to find teammates sneaking behind enemy lines through pinpoint skip passes across the court.
If attacking zones were art, then wing players would be splashing color all over that canvas—with each drive and kick-out pass causing more chaos than a toddler let loose in an open paint studio. Set these guys near both elbows outside—their job isn't only about draining jump shots but influencing contested ones too by making sure every defensive closeout feels rushed and uncertain.
Tucked away yet mighty powerful—that's how we describe folks taking charge of short corners against any staunch defense initial stand-offishness (yes I said it.). These areas become golden once the ball moves whip quick enough along the perimeter; allowing sneakier-than-a-cat-in-the-night entry passes to slip through unnoticed... until bam. Easy bucket town population: us.
Crack the 1-3-1 zone by placing a sharp ball handler at point and versatile shooters in wing and high post positions. Keep defenders guessing with quick perimeter passes to exploit short corners for easy scores.
Crack the 1-3-1 by spreading the floor, swiftly moving the ball, and punching gaps with sharp drives or skip passes.
A mixed bag of corner threes, high post action, and dribble penetration keeps defenders guessing and off-balance.
The corners are often left vulnerable in a 1-3-1; quick swings can exploit this soft spot for clean looks.
To torch zones, keep them shifting. Use feints and fast cuts to pry open those sweet-scoring seams.
Mastering how to score against 1-3-1 zone basketball starts with understanding its structure. You now know that exploiting corner areas and driving lanes can lead to victory.
You've learned ball movement is key; it makes defenders scramble, creating openings for high post entries and layups. Positioning players strategically forces the defense to make tough choices—letting you dictate the game's pace.
Remember, quick skip passes and fakes shift your opponents out of place. Keep these tactics in mind, apply them diligently, and watch as your team tears down that defensive wall play-by-play.
Embrace these lessons; let them guide your coaching or playing strategies on the court. Stay focused on good spacing and smart plays—you'll find success against even the most aggressive zones.
1-3-1 Zone Basketball. 1-3-1 Zone Basketball. 1-3-1 Zone Basketball. 1-3-1 Zone Basketball. 1-3-1 Zone Basketball. 1-3-1 Zone Basketball. 1-3-1 Zone Basketball. 1-3-1 Zone Basketball. 1-3-1 Zone Basketball. 1-3-1 Zone Basketball. 1-3-1 Zone Basketball. 1-3-1 Zone Basketball. 1-3-1 Zone Basketball. 1-3-1 Zone Basketball. 1-3-1 Zone Basketball. 1-3-1 Zone Basketball. 1-3-1 Zone Basketball. 1-3-1 Zone Basketball. 1-3-1 Zone Basketball. 1-3-1 Zone Basketball. 1-3-1 Zone Basketball. 1-3-1 Zone Basketball. 1-3-1 Zone Basketball. 1-3-1 Zone Basketball. 1-3-1 Zone Basketball. 1-3-1 Zone Basketball. 1-3-1 Zone Basketball. 1-3-1 Zone Basketball. 1-3-1 Zone Basketball. 1-3-1 Zone Basketball. 1-3-1 Zone Basketball. 1-3-1 Zone Basketball. 1-3-1 Zone Basketball. 1-3-1 Zone Basketball. 1-3-1 Zone Basketball. 1-3-1 Zone Basketball. 1-3-1 Zone Basketball. 1-3-1 Zone Basketball. 1-3-1 Zone Basketball. 1-3-1 Zone Basketball. 1-3-1 Zone Basketball. 1-3-1 Zone Basketball. 1-3-1 Zone Basketball. 1-3-1 Zone Basketball. 1-3-1 Zone Basketball. 1-3-1 Zone Basketball. 1-3-1 Zone Basketball. 1-3-1 Zone Basketball. 1-3-1 Zone Basketball. 1-3-1 Zone Basketball. 1-3-1 Zone Basketball. 1-3-1 Zone Basketball. 1-3-1 Zone Basketball. 1-3-1 Zone Basketball. 1-3-1 Zone Basketball. 1-3-1 Zone Basketball. 1-3-1 Zone Basketball.
This site requires cookies in order to provide all of its functionality.


